BASIC CUTTING:
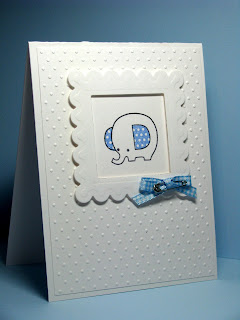
Here's the first card, with a basic shape:

Do you see that slight ridge around the white layer? I think that it gives it such a finished look. Here's the panel without the ridge:

It loses all dimensions.
So just one extra step with your Nestabilities can make a huge difference.
Here's how you work with your Nesties on a Cuttlebug.
TO CUT:
A plate on the bottom, then B plate. I add my nestie with the ridge facing up. (That little ridge is actually what cuts.)

Add your paper on the die.

Put the C plate on top and roll it on through!

TO EMBOSS:
Leave the pieces together to add the embossed edge. We are going to be using a rubber pad*. It will be placed on the back-side of the die as you are looking at it in this picture. When we squish it through the Cuttlebug, it pushes the paper into the open part of the die and gives a raised ridge.

Leave the A & B plates that were there for step 1. Slide three cardstock shims. under the die/paper (I keep three glued together for this purpose this is just for my cuttlebug, you might not have to use this.)

Place the rubber mat* on top.

Then a "B" plate Roll it through and you are done!

EMBOSSED FRAMES:
So let's take the embossing one more step and make a frame:
In this case, just cut the inner shape and emboss the edges. Then line up the outer die, keeping it on the same side of the paper as the first die. Cut it and emboss it and you have a great frame!

SPONGING INSIDE THE FRAME:
Another simple technique is to follow the steps to cut and emboss your shape and then to sponge with the frame still on:

This leaves a nice white line around the outside of your panel as in this card.

Thanks for popping by
Stella xx
No comments:
Post a Comment